Our table works hard for us. We eat all our meals together here, Emma does her school work here and Brendan colours. We craft and we sew and we create here.
When I started gathering things for our fall table, I knew I didn’t want it to take up a lot of space so it would still work with our everyday activities. I also wanted to be able to remove it quickly in case we needed to clear the table for a big project.
I’ve had my eye on rustic wood boxes lately and decided that it would make the perfect base for our fall table. So I called Dan at work and asked him if he could bring a pallet home for me, the more worn the better (he’s always seeing pallets by the side of the road on his way home from work). Sweet guy that he is, he brought one home for me that night.
After assessing what boards we thought would work well for building we started pulling it apart. We decided the four main supports would be great for the sides of the box (the outside two even had a stamp on the sides) and some of the thinner pallet boards we thought would work well for the bottom of the box.
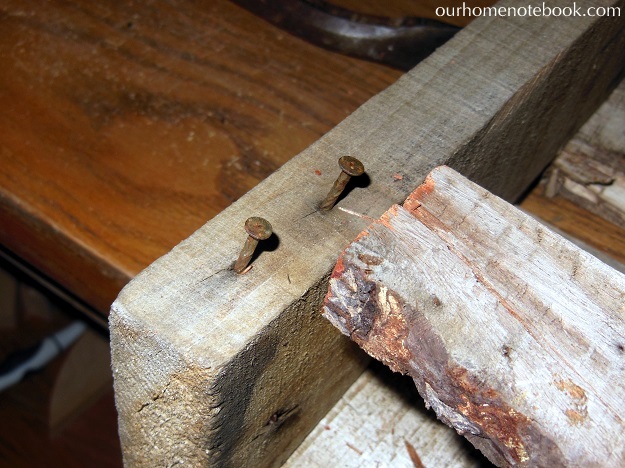
The hardest part of this project was trying to get the pallet apart without breaking all the boards in the process. After working with the crowbar and hammer for a while with very slow progress and lots of broken boards, Dan decided to take the circular saw to the rest of the boards on the back, cutting them between the cross boards and pulling out the nails and any remaining wood with the hammer.
That sped things up considerably and we were left with just the front boards to remove. We wanted to save a few of them for the bottom of the box, so we didn’t want to cut them any shorter, but now that the back pieces were off we were able to clamp the pallet to the work bench and use the sledge hammer to remove the rest of the boards. A few of them broke in the process but they came off pretty fast and we were able to save enough of them for the bottom of the box.
Using the pallet wood definitely made the project take a little longer at the beginning to get it apart (I think we spent about half an hour on it before we were able to start building) but if you can get some beautiful weathered wood from it and factor in the time you save from not having to stain or paint it, it’s not so bad.

After we had all our wood ready we laid it out on the work bench to figure out what size we wanted to make it. We decided to keep the box as long as the boards themselves (which was 30 inches), so that we wouldn’t have any new cuts on the ends of the box that would show. Then we put a few thinner pallet boards in between them and decided that we wanted the box about 10 inches wide. So Dan cut two end boards 8 inches wide from one of the extra middle boards. He also cut two corner pieces from the same board to go inside the bottom of the box at the ends to give us something to attach the bottom boards to.
After we had cut all the wood and made sure it would fit together I put some fine grit sand paper in my sanding block and lightly sanded each side of the wood to take any rough edges and splinters off. Then Dan used our Kreg jig to drill two pocked holes in each corner of the end boards and screwed them together to make the sides of our box.
To finish it off we nailed the small corner pieces of wood to the side boards, 1/2 inch up from the bottom of the box so the bottom boards could still fit underneath it. Then we turned the box over and screwed each of the bottom boards to the corner wood pieces to attach them.

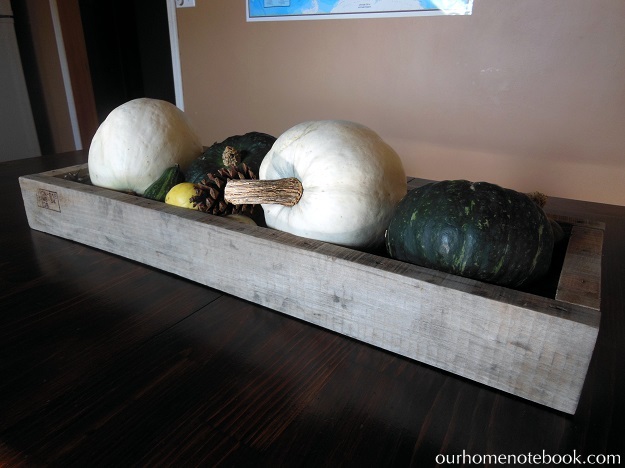
After it was finished I filled it with white pumpkins, squash, pine cones and a few smaller gourds for our fall table. So easy and pretty.
I love the weathered wood against our table and the rough waviness of the pallet boards. The stamped ends are such a beautiful little detail.
I’m thinking it will lend itself well to the change of seasons and could some in handy for parties and get togethers as a serving tray for plates, napkins and silverware or to corral a drink station.
We’ve had it set up on our table for a few days now and so far it has proved to be both pretty and practical for us. There’s still lots of room on each side of the table for place settings or colouring books. But now we get to look at this while we’re there.
Linked to: Centsational Girl, The Inspired Room.


